Friday, November 19, 2010

Day of Gratitude...

Sometimes it's fun to take a stamp set that has nothing to do with Christmas and use it to make a Christmas card. In this instance I used the large medallian image from the Days of Gratitude stamp set in the Holiday Mini to create a Christmas wreath.

To make the wreath I stamped the image with Versamark Watermark and gold embossed the image on Olive and Vanilla Cardstock respectively. I then punched the center with a 1" Circle punch. I then used the 2 3/4 Scallop Circle punch to complete the wreath. Topping each wreath off with a Real Red Taffeta ribbon bow completes that "Wreath" look.

Be sure to check out my blog on Monday for news on the Online Extravaganza. Last year there were fabulous, fabulous deals to be had while supplies last. So far I have no details on the sale so you will all have to wait until Monday. Those of you on my e-mail list will get an e-mail about it Monday morning because I don't want you to miss out on it.


Tuesday, November 16, 2010

Home for Christmas

Unless you LOVE colouring I know this may not be everyone's cup of tea for a stamp set but this "Home for Christmas" image is so wonderful I think it's worth the time to make a couple of cards with this set each year. I love the classic old fashioned look this image has and of course it pairs wonderfully with my favourite "Seasons Greetings" stamp from the Curly Cute stamp set and the Deck the Halls Designer Paper. I am pretty sure I posted this before but the easiest way to colour and not make it feel time consuming is when you are doing something else, like watching tv (not driving though :0)

There is still room in this Saturdays Christmas Vacation card class. You don't want to miss this class...it is FABULOUS and FUN (if I do say so myself!)

I had Mary draw a name this morning to win the free pack of Pearl Jewels and the winner is Alice! Congratulations! Thanks to everyone who shared their favourite embellishments!

Friday, November 12, 2010

Curly Cute Christmas


Since this "Seasons Greetings" stamp from the Curly Cute stamp set is my favourite right now, I have used it on a lot of cards I post on my blog. For this card I kept it super simple. I used the Baja and Real red glitter cardstock from Candy Cane Christmas Designer Paper. I also used one of my many already cut out snowflakes (from The Northern Frost Decorative Strip) I covered the snowflake with Dazzling Diamonds glitter and placed a rhinestone jewel in the middle. I then wrapped pearl jewels around the rhinestone (hard to see in the picture) This is also my sample for my Stampers Club homework which I hope my Sunday club has done! Hint Hint!

Below is a picture of what a pack of Pearl Jewels look like. You get A LOT of pearls for only $6.50. I think they are the funnest thing in the catalogue and have been using the pearls and the rhinestones on everything! Tell me what your favourite accessory is in the catalogue (or Holiday Mini) and I will enter you into a draw to win a new pack of Pearl Jewels! You have until Tuesday morning!


Tuesday, November 9, 2010

Greeting Card Kids....

Greeting Card kids is such a great stamp set if you love to colour (even if you don't this card only took a couple of minutes to colour) I think colouring is intimidating to a lot of people but it's super easy with Stampin Write Markers because of the two tips on the markers, fine and brush.

If you are planning on mass creating a card that needs colouring, what I do is first cut out cardstock the size I will need for the stamp. I then mass stamp the image. Next I sit in front of the tv with a tray and colour each image, doing one colour at a time. For example I would take the Marina Mist marker and colour the hat and coat on each image. I find it easier to do that kind of work when I am watching tv!

Supplies used on this Card:
  • Greeting Card Kids stamp set
  • Curly Cute stamp set
  • Northern Frost Decorative Strip (page 38, Holiday Mini)
  • Dotted Scallop ribbon Border Punch
  • Marina Mist, Bashful Blue and Whisper White Cardstock
  • Black Staz On
  • Marina Mist, Bashful Blue, Wild Wasabi, So Saffron, Blush Blossom and Poppy Parade Stampin Write Markers
  • Rhinestone brad
  • Rhinestone Jewel
  • Dazzling Diamonds Glitter

Saturday, November 6, 2010

Dasher....

Dasher is a favourite and no matter what you do with him I think he makes a card look good! Last year Dasher was easily my best selling stamp, followed by the Snow Swirled stamp set. This year my best selling stamp set has been Bells and Boughs, from the Holiday mini catalogue (followed by Snow Swirled yet again...is there anyone who doesn't have this set yet?)

I think my favourite part of this card is the Seasons Greetings sentiment from the Curly Cute stamp set (click HERE to see the whole set). I can't believe I overlooked this stamp set in the catalogue until recently. It's so fabulous and I know I will get a lot of use out of it all year!

Supplies Used on This Card:
  • Dasher Stamp
  • Curly Cute Stamp Set
  • Jolly Holiday Designer Paper
  • Cherry Cobbler, Very Vanilla and Early Espresso cardstock
  • Early Espresso Classic In
  • Cherry Cobbler Seam Binding (Mini Catalogue, page 21)
  • Perfect Polka Dots Embossing Folder

Thursday, November 4, 2010

A Night of Navy Card

I promised a blue card yesterday so I made this quick card yesterday to fulfill that promise. I used the Sweet Snowglobe stamp for the main image, colouring the tree and the house inside with a Always Artichoke and Night of Navy Marker before stamping. I added some Dazzling Diamonds glitter for the snow.

Also used on this card were the Ticket Corner Punch, Northern Frost embossing folder, Bright Christmas stamp set ("Winter Wonderland), White Craft ink and White embossing powder.

Embossing with white embossing powder is about the only way to get a true white image on darker cardstock. When embossing words it is important to use a light touch when inking and stamping. Too much pressure will cause the ink to smoosh out, making the words run together and smaller letter like "o" to come out as a solid circle.

I had Mary do a draw for the Sweet Treat cups and the winner is Debbie. Congratulations Debbie.

Wednesday, November 3, 2010

Contempo Christmas

I think you all may begin to notice a trend in most of the Christmas cards that I will be posting. Almost all of them seem to include the colour Cherry Cobbler which is now my favourite go to colour for Christmas (it use to be Real Red, which I still enjoy but has lost some of it's magic now that a new colour has caught my eye!) Of course it helps that Jolly Holiday and Deck the Halls Designer Series Paper has this colour in it. I think I am going to have to spend some time this week making cards without this colour...it will be a challange for me. I will try to post something blue tomorrow!

I made this card using the Contempo Christmas bundle on sale right now. This bundle includes the Contempo Christmas stamp set and Jolly Holiday Designer Paper. The price for the Clear Mount Bundle is $21.96, for Wood mount Bundle it is $25.96. To finish off the card I used the Perfect Polka Dots Embossing Folder and Old Olive Grosgrain ribbon.

Thanks for all the comments on Sunday's card. To answer your questions we will be making a Treat Cup shaker card in my Christmas Vacation card class on Saturday November 20th. The two I posted were my "rejects" for the class even though I think they are super cute.

Monday, November 1, 2010

Sweet Snowglobe

I am loving my Sweet Snowglobe stamp from the Holiday Mini, especially because the size of the snowglobe is the perfect fit for our Sweet Treat cups. Together they make the cutest little shaker card filled with glitter and beads. What I did was replace the image inside the snowglobe with the snowman from a Cute Christmas stamp set the Holiday Mini. These cards were both made with the colours of Whisper White, Baja Breeze and Real Red. To finish off the cards I used a snowflake from Sizzix Northern Frost die and a Real Red Glimmer brad (all in the Holiday Mini)

Post a comment and you could win a package of Treat Cups and 1/4 oz package of Dazzling Diamonds glitter to help you get started in making your own shaker cards. Post your comments before Thursday morning and I will post the winner.

Sunday, October 31, 2010

Bells and Boughs

I know it's Halloween but I am all out of Halloween projects to show! I hope you all have a happy Halloween. This is going to be the coldest Halloween I can remember so it looks like it's going to be winter coats over halloween costumes tonight!

Bells and Boughs has been an instant stamp hit as soon as the Holiday Mini was released This is a super simple card to make and easy to reproduce if you love to colour. This card was coloured with markers and make with the colours of Cherry Cobbler, Always Artichoke and Very Vanilla. To embellish I used Very Vanilla Satin ribbon (super elegant for Christmas cards) and some Champagne shimmer paint (page 195) for the centers of the Poinsettia. I also used a sponge dauber to add some crumb cake ink around the main image. The Merry and Bright sentiment is from the Bright Christmas stamp set in the Holiday mini.

Friday, October 29, 2010

Aviary...

Here is a card I made with the super cute Aviary stamp set. Although I bought this set over a month ago this is the first card I made with it because I have been so immersed in Fall, Halloween and Christmas. I think it will be an odd thing to see a card or project on here that isn't Christmas for the next two months because I have not even looked at any of my stamps that aren't for Christmas.

Products used on this card:
  • Aviary Stamp set
  • A Word for You stamp set
  • Crumb Cake, Early Espresso and Blushing Bride Cardstock
  • Crumb Cake and Early Espresso Classic Ink
  • 1 1/4, 1 3/8 Circle Punch
  • 1 3/4 Scallop Circle Punch
  • In Colours Patterns Designer Paper
  • Basic Pearls Jewels

Thursday, October 28, 2010

Upcoming Classes

To the left is one of the cards we will be making in my Christmas Vacation class on November 20th. This card class is full of fun images and fun colours. There are only a few spaces left so please sign up soon! This card was made with the Cute Christmas stamp set and Melon Mambo, Wild Wasabi, Pretty in Pink and Certainly Celery colours.

Below is a list of my upcoming classes!

Christmas Vacation Card Class
Saturday November 20th, 10 am.

Cute and fun is the theme of this Christmas card class. Lots of cute images and fun colours will be used at this Christmas card class. This is a 10 card class (2 each of 5 design)

Class fee is $30 or FREE if you place a *$65 order the day of the class.
*before shipping and tax.

"It's Not a Card Class" Christmas Class
Saturday December 4th, 10am.

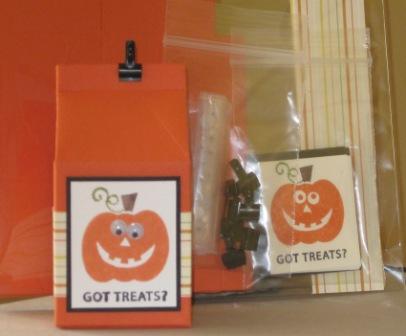
At this class we will be making basically anything but a card. We will be making:


  • Tin of gift tags x2
  • 4 gift card holders
  • Notecards and a box (perfect gift for a teacher) x2
  • giftbags x2
  • treat holders x 4

The cost for this class is $35 (free with a $65 purchase that day!)

Last Minute Christmas Card Class

Saturday December 11th, 10am

This is a great card class for those of you who know already that you are going to need more cards then you have to time to design and make. Still lots of time to mail them out and there great to have when someone sends you a card and your forgot to mail them one (doesn't this happen every year to me! I'm so disorganzied come December) This will be a 10 card class (5 designs, 2 of each card)

COST: Instead of a the normal $25/$30 fee I would like all attendees to bring the following three items as class payment:

  • a donation for the All Heart Pet Rescue ( dog food, toys, treats etc)
  • a donation for the Food Bank
  • one new unwrapped toy (not for Mary...to donate...LOL!)

Thank You Card Class

Thursday December 30th, 10 am.

I thought it would be nice to end this year with a thank you card class. The cards in this class will be notecard size and of course you can use different sentiments on your cards. This class will be 20 card class (4 each of 5 designs) Class fee will be $25.

Saturday, October 23, 2010

Handmade Holiday - An Addition...

Because the Handmade holiday bundles have been so popular, Stampin Up is adding a second Tags Til Christmas Bundle. Since the original Tags Till Christmas Bundle includes the Decorative Label punch which is now on backorder they are offering a second bundle which inlcudes the Tags til Christmas stamp set (the ornament stamp being featured in todays cards) and the Ornament punch.

This Bundle # 2 will be offered at the same price, $49.52 for the wood mounted Tags Til Christmas stamp set and Ornament punch and $41.52 for the Clear Mount stamp set and ornament punch.

The original bundle with the Decorative Label punch is still available only the punch might now be shipped right aways (they are expecting several shipments of these punches in the next few weeks!)


  • Here is a card I made in several colours so you can see how much a card can change depending on the colour. I find it more fun to stamp card like these because I get bored easily stamping the exact same things over and over again.

  • Supplies Used on these cards:
    Tags til Christmas stamp set
  • Bright Christmas stamp set
  • Baroque Motifs stamp set
  • Old Olive Classic Ink
  • Black Staz On
  • Rhinestones
  • Whisper White cardstock
  • Old Olive Taffeta ribbon
  • Sizzix Top Note die (Old Olive layer was hand cut!)
  • Cherry Cobbler, Night of Navy or Rich Razzleberry Classic ink/cardstock


Congratulations to Irene who came the closest to guessing the amount of candy in the jar. The correct # was 44.

Wednesday, October 20, 2010

Spooky Spider

This cute jar was made using the Decor Elements Spooky Spider in the Definitely Decorative Catalogue (click on my website and then onto products to view or ask me for a catalogue if you want to see them all) I took this $5 jar and sponged the inside with White Staz On ink to make it look more opaque. It took two minute to rub the Vinyl on and tie the black lace around the top and I was done! All that was left was filling it with CANDY!

Post a guess at how much candy is inside this jar and the person who gets the closest will win this jar and all the YUMMY candy inside. You have until Saturday morning to take a guess. To give you a little hint the number of pieces of candy inside the jar is in between 20 and 80!

How to Post: Click on the title of this post (Spooky Spiders) and it will take you to a new page. Scroll down and you will see a spot to post your comment. Don’t forget to post your name!

Tuesday, October 19, 2010

Handmade Holiday

It's hard to believe, but the holidays are right around the corner. The ABCs of the Perfect Handmade Holiday will help you prepare for the holidays without all the stress. From October 19-December 16, 2010, we'll be offering you holiday bundles perfect for creating Amazing cards, Beautiful packaging, and Cherished gifts--all at 20 percent off!

Stamp Set Bundles


Bundle Description


Wood-Mount Bundle Item


Wood-Mount Bundle
Sale Price


Clear-Mount Bundle Item


Clear-Mount Bundle
Sale Price

Vintage Christmas Card Bundle


  • Bells & Boughs Set

  • Deck the Halls Designer Series Paper

124067


$29.96


124068


$24.36

Contempo Christmas Card Bundle


  • Contempo Christmas Set

  • Jolly Holiday Designer Series Paper

124071


$25.96


124072


$21.96

Tags til Christmas Bundle


  • Tags til Christmas Set

  • Decorative Label Punch

124077


$49.52


124078


$41.52

Gift Packaging Bundle


  • Gifted Set

  • Mini Lunch Sacks

124083


$31.92


124084


$24.72

Simply Adorned Gift Bundle


  • Charming Set

  • Simply Adorned 1" x 1-1/4" Charm

  • Simply Adorned 24" Chain

124076


$52.32


---


---


Non-Stamp Set Bundle

Bundle Description

Bundle Item


Bundle Sale Price

Frame Gift Bundle

  • Definitely Decorative Chunky Frame

  • Small Chocolate Chip Dotted Flourish Décor Elements

124075


$23.12


Monday, October 18, 2010

Leaf Lines....


Although there are no leaves left on any of the trees (isn't amazing how northern Ontario changes from full colour to absolutely nothing) I though I should post this card I made awhile ago since soon I will be posting Christmas, Christmas and more Christmas!

For this card I used the Leaf Lines stamp set and yes, I did carefully cut out the Oak Leaves! Fun stuff! You all know how I love to cut! The colours I used on this card were Early Espresso, Soft Suede, Old Olive and Very Vanilla. To finish the card off I used a 1/8 Taffeta ribbon in Earl Espresso.

I have been in full Christmas mode cutting all the cards and pieces pieces those of you coming to my Saturday and Monday "It's a Wonderful Life" Christmas card classes will get to play with. I am so thrilled with the cards and I know you all will be too! Be sure to check my blog tomorrow for a new Holiday Promotion Bundles starting tomorrow and ending on December 16th!

Thursday, October 14, 2010

Batty for You....


The Batty for you stamp set has been around for awhile but since I tend to go towards a more "fun" Halloween theme when I stamp it's absolutely perfect. The Spider Web embossing folder looks super cool when you use vellum instead of cardstock. Just remember that all adhesives show through vellum so I tend to just use brads to layer it to my card. I also uesed the spider web from the "Wicked Cool" stamp set to stamp the Old Olive with black ink to create an interesting background. The spider was layered using the 1 1/4 circle punch, the 1 3/8 circle punch and the scallop circle punch.

My next order will be going in on Monday October 25th. If there is anything you need please let me know then!

Sunday, October 10, 2010

French Foliage again....

Here is another card I did with the French Foliage stamp set and the Rock and Roll technique. As much as I am looking forward to diving head first into Christmas I am kind of sad because I just got this stamp set and it's not very "Christmassy" and it will be a bit neglected soon. Colours I used on this card are Cajun Craze, More Mustard, Early Espresso and Old Olive. The card is finished off with an Early Espresso bow and I used the Square Lattice embossing folder to create the texture.

If there is anything you need my next two orders are going in on October 13th and October 25th. You can of course go to my Stampin Up website and place an order through my shopping cart day or night. Be sure to check out the VERY popular Clearance Sale going on right now!

Thursday, October 7, 2010

Pun Fun Happy Bird-day


It's been a while since I played with Pun Fun so I pulled it out to make what I thought would be a quick little card. Of course I had to make it harder than usual and wanted a pattern on the red. So I took the little word stamp from the Birthday Bliss stamp, employed my wonderful stamp-a-ma-jig and stamped that stamp a zillion times to create this background. I coloured the bird with Daffodil Delight and Real Red.

Another fun thing I did with this card was make my own little glitter brads. They are kind of hard to see in this photo but all I did was cover a Daffodil Delight brad with a glue dot and dipped it into Dazzling Diamonds glitter. I can't wait to try this with other colours.

Tuesday, October 5, 2010

French Foliage...

Welcome to a card from my newest stamp set, French Foliage from the Holiday Mini! I LOVE THIS SET! Its so easy to use and no matter what colours you use it looks terrific. My stampers clubs will be using this stamp set this month as well as any non-Christmas card classes I am doing. For this card I used a Rock and Roll technique. Each stamp was first inked in More Mustard and then I rolled the edges of the stamp in a different colour ink pad (Cajun Craze, Old Olive and Pumpkin Pie.) I used a Vanilla Taffeta ribbon and one of the beautiful antique brads to finish it off.

The sentiment is from the Grateful Greetings stamp set, stamped in Chocolate Chip. Speaking of Grateful Greetings the winner of the brand new stamp set is CeeJay. Thanks so much for posting comments on my blog. You all will never know when I will randomly give things away!!!

Some things to remind you of:
  • Check out the Clearance Rack on my website. It has been updated with all kinds of new stuff on deep discount. Remember that I can't order these for you and the orders must be placed online. To get there click on the "My Stampin Up Website" link to the right and then click "Shop Now"
  • Only a few days left to get the fabulous Starter Kit deal. See my September 27th post for more details.
  • Be sure to vote in my new poll to the right. I love to see what you are liking!
  • There is still room to sign up for the It's a Wonderful Life Christmas Card Class(Monday class)

Monday, October 4, 2010

Big Shot Halloween Treats

I love my Big Shot for so many reasons but at this time of the year, when I am making treat holders I love it even more because it makes my life so much easier. Today I am posting three different treat holders I made using different Sizzix Box Dies. These boxes literally only took minutes to make. I stuck with my favourite Halloween colour combinations of Basic Black, Whisper White, Pumpkin Pie and Rich Razzleberry for all three projects.

At the top I used the Baskets and Blooms die to make a super cute basket but before I assembled the basket I ran the front of the basket through the Big Shot with the Spider Web embossing folder. I then used a sponge dauber and white craft ink to add some ink to the web to make it really pop. Also used on the basket was the Batty for You stamp set, the 1 1/4", 1 3/8" circle punches, the scallop circle punch and Razzleberry grosgrain ribbon.

On the bottom to the right I used the Box #2 die only I cut off the top. I cut a strip of black paper and cut it with the Scallop Border punch to line the top of the box. Also used on this project were the Wicked Cool stam set, Rhinestone Jewels (for the shoes...hard to see) and Pumpkin Pie Grosgrain ribbon.

For the third project I used the Milk Carton die and cut the top off. It makes a super quick small box. I decorated the box using my favourite treat stamp set Got Treats and Pumpkin Pie ribbon.

My next order is going in this Thursday (the 7th) so if there is anything you need please be sure to get it to my by then!

Saturday, October 2, 2010

It's a Wonderful Life Card Class....

Here is one of the cards we will be making at my "It's a Wonderful Life" Christmas Card Class later this month. While it's hard to see the details in this picture I just love the tree from the Snow Swirled stamp set embossed with gold. The teeny tiny pearls decorating the tree add the perfect touch.

While the Saturday the 23rd class is FULL the Monday October 25th (10am) class still has room. The class is $30 for 10 cards (2 each of 5 designs) or FREE if you place a $65 order the day of the class. Contact me to sign up!

Stephanie
s-pdavid@sympatico.ca

Friday, October 1, 2010

Trendy Trees....


An oldie but a goodie...I love my Trendy Trees stamp set. I have never failed to make a super cute card with this set (if I do say so myself!) I used my favourite autumn colour combination of More Mustard, Cajun Craze and Early Espresso. The sentiment is from the Level 3 hostess set Occasional Quotes. I used a Early Espresso 1/8 ribbon to finish it off.

I still have room in my Monday October 25th "It's a Wonderful Life" Card class at 10am. The Saturday class is FULL with a waiting list now so if you want to move to the Monday class let me know. It's worth taking a day off work to do, I think anyways! LOL! I will be posting one of the cards we will be making at that class tomorrow so check it out.

Just a FYI on some totally useless but I find interesting information, when I was at my regional seminar last weekend they told us that last years #1 selling stamp set was the Medallion Background stamp on page 142. So far this year the #1 selling stamp set is Just Believe (page 109) I have them both and I know why they are #1.

I have to say I really really appreciate it when you comment on my cards or answer the little questions I ask on my blog. It's nice to know someone is reading and enjoying the work I put into it. So post a comment to todays card, telling me your favourite autumn colour combinations and the set you are using the most right now and I will enter you into a draw to win the fabulous Grateful Greeting stamp set on page 27. For everyone who has posted a comment on any post in September you will get a ballot for each of those comments as well (and no Irene, you can't go back and comment on all my September posts today because I already filled out ballots LOL!) I will do this draw on Tuesday morning so be sure to post a response by then!

Monday, September 27, 2010

The Greenhouse Gala Tote

I don’t usually talk a lot about recruiting on my blog but here is my second post in two days about signing up to be a demonstrator. I had some e-mail questions and I thought I would post the answers here since it isn’t something we all talk about that often.

One of the questions was whether or not you could sign up to become a demonstrator and never place an order. The answer is YES. I have had several people sign up to become a demonstrator just to get the starter kit, which at $215 (shipping is FREE and there is NO tax on a starter kit!) is a fabulous deal. If you just want the kit (and the Greenhouse Gallery Tote and the new not released yet Eat Chocolate stamp set) and don’t plan to ever place an order that is 100% ok! Your regular discount if you do place orders is 20% but the first order you place is 30% off.

The second question I got was what exactly is in the Starter kit. There is a ton of stuff including stamp sets, ink pads, cardstock and ribbon. The easiest way for you to see what is in the starter kit is to click on the photo below. The best thing about Starter kit is that it is totally customizable. You get to pick which stamp sets, which ink, what colours of cardstock you would like to get.

The third question was whether or not you could still be in my club or classes if you signed up and the answer is OF COURSE. My downline (demonstrators who have signed up through me) have been in my clubs and classes for the past few years so it’s not a problem at all.

As an added bonus, if you sign up to get your demonstrator kit BEFORE October 1st (like the fabulous tote and Eat Chocolate set isn’t enough) you will get to attend my November “Christmas Vacation” card class absolutely free.

How to sign up:
Go to my Stampin Up Website (HERE) and click on the “Start Your Own Business” link along the top of the page. Follow the instructions and see how you can customize your kit. It is NOT finalized until the end so if you want to go in there and play around go right ahead. The only thing you need is my password which is “chocolaterocks”

Sunday, September 26, 2010

My Weekend....

I had such a fabulous weekend! Yesterday I attended a Stampin Up convention in Hamilton with Irene and it was a blast! It was so much fun to meet other demonstrators and to be able to sit and watch awesome demonstrations of some super cute techniques and projects. Those of you who are in my clubs and classes will get to see some of them really soon. Believe me, you won't be disappointed!

I posted three of the pictures I took of the display boards they had out. There were so many fabulous cards to look at. I have a whole box full of cards I swapped with other stampers for you all to check out when come to class and club this month. Believe me, you wish list is going to grow like crazy (mine has) when you see them! Start saving now.....LOL!

Thanks for all the fabulous ideas for what you would like to make in my final Christmas class of the year. Stay tuned this week because I will be posting it on my blog. Congratulations to Anne who's name Mary picked to with the Dasher paper and cardstock package!


The last picture I posted is special because it features the brand new stamp set "Eat Chocolate" which will be available in the next mini! You can earn this set FREE if you sign up to be a demonstrator by October 10th. Whether you just want a discount on all your stamp supplies, just want the Starter Kit ($215) or think you might want to earn some extra money now is a great time to sign up. Not only will you get the fabulous free Eat Chocolate stamp set you will also receive a Free Craft Tote! Contact me if you have any questions!

Thursday, September 23, 2010

Autumn Harvest Halloween


I used three stamp sets to make this card: Wicked Cool for the spider web, Grateful Greetings for, well, the greeting and Autumn Harvest for the pumpkins. What I love about the Autumn Harvest stamp set is that the faces for the pumpkins is a seperate stamp so you can just make a nice traditional fall scene with pumpkins, leaves and squash or you can add the faces for Halloween.

I used white craft ink to stamp the webs on black. It's the only way to get ink to show up on black cardstock unless you emboss in white. The pumpkins were stamped in black and then I used classic ink (More Mustard, Tangerine Tango) and an aqua painter to colour them. I used a sponge dauber and black ink to sponge around the white piece I stamped the sentiment on. I think it gives that instant Halloween look if you sponge things with black!

Tuesday, September 21, 2010

Rich Razzleberry and Old Olive

Just Believe is definitely my favourite set in the new catalogue. I always tend to love flower stamps, ever since I began stamping years ago. This set is so elegant and pretty I keep reaching for it even though I have lots of other new stamp sets I want to use.

I made this card with Rich Razzleberry, Very Vanilla and Old Olive which are absolutely gorgeous together. Not only are these colours super elegant with the Vanilla but they also make super cute Halloween colours if you exhange the vanilla for Basic Black and add some Pumpkin Pie.

It is embellished with an Olive Satin ribbon, the Finial Press embossing folder, the Ticket corner punch and a frame holder from the Styled Silver Hodgepodge kit. I used Old Olive and Rich Razzleberry Stampin Write markers to colour the image before stamping it.

I am planning a non-card Christmas class on December 4th and I am looking for some idea’s of things, other than cards, you would like to make for Christmas. Post a comment and I will enter you into a draw to win a retired pack of Dashing Designer Paper and 8 coordinating sheets of 8 ½ by 11 cardstock. This paper is so super cute with the beautiful Christmas colours of River Rock, Real Red and Old Olive! I will announce the winner of this on Monday so be sure to let me know your opinion before then.

***If you are not sure how to post a comment just click on the title of this post (Rich Razzleberry and Old Olive) and it will take you to a new page where you can let me know what you think!) Don't forget to sign your name to your comment!

My Saturday October 23rd "It's a Wonderful Life" Christmas card class is now FULL but there is still room in the Monday October 25th class.

My next order is going in on Sunday the 26th so if there is anything you need please get your order to me before then!

Sunday, September 19, 2010

Baby Bundle

I don't make a lot of baby cards because most of the people I know are done having babies (we're all way too old...LOL!) but I do know a few people having babies so I thought I would make this sweet little baby card.

I tend to always make baby cards in pink (probably because I have a girl) but the pink could easily be substituted for Bashful Blue in this card. This card was made with the Baby Bundle stamp set and the Short and Sweet stamp set. I used Very Vanilla, Pink Pirouette and Soft Suede as the colours. It is embellished with the Perfect Polka Dots embossing folder, the Modern Label Punch, A Paper flower, Antique brass brad and the ticket corner punch.

I totally forgot to do the draw for the card kit yesterday (my parents came for dinner) so the winner of the card kit is GISELE! Congratulations and thanks to all of you who post comments on my blog. I really love reading what you all write! I will be posting more contests in the next week!

Friday, September 17, 2010

Greeting Card Kids...

I don't normally make Halloween cards but this little girl is so cute I have to find lots of ways to use her this year! The Greeting Card Kids set is new in the catalogue and the images are just super darling...I hope SU makes another set using these kids! If you love to colour this stamp set is for you.

This card was made with Concord Crush and the main image was coloured by using Classic Ink and a watercolour brush. The Happy Halloween is from the All Holidays stamp set.

I will announce the winner to my last blog contest so you still have one more day to post a comment.

I have added a second date to my "It's a Wonderful Life" Christmas Card class because the Saturday filled up so fast. The class is now available on Monday October 25th, 10 am at my place so contact me to sign up. To see more details on the class click HERE.

Wednesday, September 15, 2010

Just Believe in Brights...


When I first started making this card I pulled out my typical autumn colours (Very Vanilla, Cajun Craze, Early Espresso and More Mustard) mostly because I feel ""Just Believe is a very elegant stamp set and needed elegant colours. Of course I changed my mind and you can see the finished product here.


I stamped the circle stamp with every colour in the Brights colour family and then set them out to see which colours would pop together. In the end I chose Melon Mambo, Tempting Turquoise and Tangerine Tango. I punched the circles with a 1 3/8 circle punch and layered them onto circles I cut out with the Circles #2 Sizzix die. The card is finished with a sentiment (from the Level 3 Hostess set Simply Sent Cute as a Button) stamped in black and a corner rounder punch.

Let me know which colours you are reaching for when you go to stamp and I will enter you into a draw to win a kit to make 5 of the card shown (with lots of different bright colours!)

Tuesday, September 14, 2010

Elements of Style in Pretty in Pink


I’ve been very much into “Autumn “ mode that I thought a pink card would be a nice change of pace today. This card was made with the Elements of Style stamp set with Pretty in Pink, Certainly Celery and Very Vanilla colours. As much as I love pink and bright colours I am finding it really hard to make cards with them at this time of year. I just want to use the rich colours of fall and I can hardly wait to get out all my Christmas stamps and start making cards with them!

Thanks to all who posted a comment below under my Got Treats post. I just did the draw and the winner of the treat kit is Gisele! Congratulations!

Monday, September 13, 2010

"Autumn Harvest" Leaves

I love stamps with leaves on them, especially in the fall because you get to colour them some fun colours. This card took a little bit of extra work. First I have to stamp and emboss all the leaves in the shape of a wreath. I used Black Craft ink and Clear embossing powder for the stamping. To get them in the shape of a wreath I punched out a circle and stamped the leaves around the punch out. This took a few tries to get it looking the way I wanted it. I ended up creating a mask (stamping the image on a post it note, cutting it out on the lines) and placing it on the leaf image I was stamping next to so the leaves wouldn’t over stamp each other.

To colour the leaves I put a few drops of More Mustard ink refill on a tile and then I dipped a small watercolour brush into Champagne Mist shimmer paint. I mixed it in with the More Mustard ink and painted the leaves. I then did the same thing with Cajun Craze ink, adding just a bit more to the leaves to give the leaves a two tone look.

To finish off this card I coloured a Vanilla Taffeta ribbon with a More Mustard Stampin Write Marker. Other items used on this card were the Sanded Background stamp, Cajun Craze and More Mustard Classic inks, gold brads and the Ticket Corner Punch.

My next orders for this month are going in on Saturday September 18th and Sunday September 26th. If there is anything you need please get your order into me before these dates. Thanks!

Saturday, September 11, 2010

Got Treats?


I just love the "Got Treats" stamp set! I make a lot of treats to send to school throughout the year and this stamp set with the super cute Milk Carton die for the Big Shot is going to get used A LOT!!

To make this box I used Tangerine Tango, Very Vanilla and Basic Black cardstock. I used Tangerine Tango Classic ink as well as Chocolate Chip, Old Olive and Basic Black Stampin Write Markers. I finished the box off with Mini Library clips (page 187), Sunny Days Designer Paper and googly eyes for the jack-o-lantern.

Post a comment and tell me what you like to make for Halloween, whether its baked goods, treat holder, cards are any other craft and I will enter you into a draw to win this super cute box as well as the parts to make 6 more! Comment before Tuesday morning because I will be doing the draw then!

Sunday, September 5, 2010

Falling Leaves....


It's so cool today I thought it would be the perfect day to post a card that felt like autumn. This card was made with the stamp set Falling Leaves and the background stamp Sanded. For the colours I used More Mustard, Cajun Craze, Elegant Eggplant and Very Vanilla. I also used the Modern Label Punch (and the Big Shot with Punch Windows for the layer) and the Square Lattice embossing folder to embellish the card..

I am soooo excited that there is only 1 more day until school begins. Today we were cleaning out Mary's backpack and we found last years lunchbox, still full of last years lunch....super gross let me tell you. Needless to say I didn't even open some of the containers because one of them had milk in it and another had yogurt. Thank goodness i bought a few new containers because those ones went straight into the garbage! Along with the lunchbox which did not smell good! I guess that is a lesson to be learned. Clean out the backpack on the last day of school, not right before school starts again!

Congratulations to CeeJay who won my draw for some silver goodies. Be sure to watch my blog for more giveaways this month!

Hopefully you will all see the Holiday Mini in your mailbox by the end of the week! I called and the last of the mini's were sent out by Stampin Up last week so please let me know with a quick e-mail or comment when you get yours!

Friday, September 3, 2010

The Holiday Mini


On September 1st the new Holiday Mini Catalogue began and it is full of some fabulous new autumn, Halloween and Christmas stamps and accessories. Click on the link to check out the fabulous new Northern Flurry embossing folder (page 26), the Candy Countdown Calendar Kit (page 34), the Paisley Prints stamp set (page 11) and much much more!

I hope most of you have got your copy in your mailbox but if you didn't receive it please send me a quick e-mail to let me know so I can make sure you get yours.

There is still three spots in my Super Quick cards class on the 18th. Be sure to let me know if you want to sign up for that.

Post a comment on this post (click the title to post...comments are moderated by me so it won't show up until I approve it) and let me know what you like about the Holiday mini and be entered into a draw to win a roll of Silver Elastic Cord (retired) and Platinum Shimmer paint. I will do the draw on Sunday morning.

Tuesday, August 31, 2010

Host a workshop in September!

Host a workshop in September and get a FREE bonus stamp set. That is on top of the other hostess benefits you are entitled to ($20 in free merchandise and a Level 1 Hostess set for a $200 workshop!). I have several envelopes with pictures of stamp sets in them. Pick an envelope and I will bring that stamp set in that envelope to your workshop for you! Club members are entitled to this benefit as well as long as they invited 3 extra people to their club meetings this month!

This card was made with the Birthday Bakery Level 1 hostess set, Poppy Parade, Pear Pizzazz and Tangerine Tango Cardstock and Daffodil brads. I coloured the image with Stampin Write Markers.

Congratulations to Helene who won the Punched Posies stamp set at my All A Flutter Class this past weekend.

Watch my blog in September, comment on some posts and win some prizes. I am going to be offering some "blog candy" throughout the month so those of you who read my blog will be eligable for some great prizes!

Sunday, August 29, 2010

Flight of the Butterfly in Cajun Craze....

I know I have been neglecting my blog this month but I've been away and was too lazy too post anything. Hopefully things are getting back to normal and in September there will be more regular postings! One more week until back to school and I am looking forward to having some creating time. Taking a few weeks off stamping has left me creatively impaired. I hope I get back to normal soon because I have some nice new stamp sets I want to get some ink on!

This card was made with one of my favourite stamp sets, Flight of the Butterfly. It's so simple and easy to use, mostly because I have the great Butterly Punch to cut out the butterflies for me. For the colours I used Very Vanilla, More Mustard and the fabulous Cajun Craze (a must have colour for fall I think) To finish off the card I used the Perfect Polka Dots embossing folder, a Scallop Border punch and a Cajun Craze brad.

Wednesday, August 25, 2010

Sooooooo happy to be home!!!


It's been a long 2 1/2 weeks since I have been home and I am so happy to see my bed, my coffee maker and my cat again! Jake LOVED PEI! He loved going to the beach and chasing the birds (I'm sure the birds loved it...don't worry, he never got close!) We had beautiful weather, at lots of seafood and hunted down a bunch of sea glass!

Don't forget to check out the garage sale this Saturday at my house, 2pm until 3:30. I have several stampers bringing stuff to sell so I am sure you can get some great deals!

Saturday, August 21, 2010

Upcoming Christmas Card Classes...


Christmas card classes are starting in October so here is some advance details of my two Christmas Card classes for October and November. These classes are available as private card classes in your home. Details of the private classes are slightly different so contact me for more details.

The Christmas card classes this year will not be available "to go". If by some chance you can't make it to a class and you are past the cancellation deadline, there will be a fee for me having to make them for you.

The card I posted today is one from last year and is not on we will be doing this fall. The "A Merry Little Christmas..." sentiment is now retired.

--------------------------------------------------------------------------------------------------------
“It’s a Wonderful Life” Christmas Card Class
Saturday October 23rd, 10 a.m.

Classic cards will be the theme of this Christmas card class. We will use traditional colours and elegant stamps on these card. This is a 10 card class (2 each of 5 designs)

Class fee is $30 or FREE if you place a *$65 order the day of the class.
*before shipping and tax.
------------------------------------------------------------------------------------------------
“Christmas Vacation” Christmas Card Class
Saturday November 20th, 10a.m.

Cute and fun is the theme of this Christmas card class. Lots of cute images and fun colours will be used at this Christmas card class. This is a 10 card class (2 each of 5 design)

Class fee is $30 or FREE if you place a *$65 order the day of the class.

*before shipping and tax.
-------------------------------------------------------------------------------------------------
I will be posting details of my December class a little later since I don’t have all the details worked out yet but it will be on December 4th.

Tuesday, August 17, 2010

Super Quick Cards Class


To the left are a few of the cards we will be doing in my Super Quick Cards Class in September. This will be a 15 card class (3 cards each of 5 designs)
This class is on Saturday September 18th, 10 am at my place (only one date for this class) This class is $30 but FREE if you place a $70 (before shipping and tax) order the day of the class. $30 is still required in advance to hold your spot. 4 spaces left so sign up early!!

If you signed up for Stampers Club I will be e-mailing you shortly letting you know the date of your first club meeting and the month in which you will be hosting. I am just waiting to hear back from my September hostesses (sp?) so I don't have to pepper you all with e-mail. I have already drawn names for months so feel free to e-mail me if you can't stand the suspense! LOL!

I am hoping to have all my Christmas card classes from October to December posted before the end of August. I am just working out the details of each class right now!

Friday, August 13, 2010

Watercolour Trio


This is a slightly unusual colour combination that I am starting to really enjoy, red and purple. On this card I used Cherry Cobbler and Concord Crush together with some Old Olive and Pear Pizzazz. Not colours I would normally use together but I saw them together on a Kleenex box and knew I had to try the colours together on a card.

On this card I used the Watercolour Trio stamp set, the new Vintage Wallpaper Embossing Folder and a Filigree Brad. The Watercolour Trio stamp set is in the Summer Mini which is ending August 31st. My last order of the month will be going in on the 30th so be sure to get your orders to me before then if there is anything you would like.

Some Reminders:

I have a friend who is looking for an old stamp set called "Elegant Ornaments" If you have this stamp set and wish to get rid of it please let me know so I can get you two in touch with eachother.

Tuesday, August 10, 2010

I love Iridescent Ice Embossing powder...

i

It's hard to tell from this picture the but whole butterfly image was covered with Iridescent Ice embossing powder. I just love the way that looks! It's such an easy technique that adds some real ooh la la to your card.

First I stamped the butterfly image (All A Flutter, Summer Mini) with Black Staz On on white cardstock. I then coloured the butterfly with Marina Mist, Bashful Blue and Basic Gray Stampin Write Markers. When that was dry I pressed my Versamark Watermark ink pad all over the white cardstock and piled on the Iridesent Ice embossing powder. I tapped the white cardstock to remove the excess powder and then carefully heat it up with my heat tool (holding onto the edges, kind of like how you should hold a photograph)

Other items used on this card are:

  • Scallop Edge Punch
  • Perfect Polka Dots Embossing Folder
  • Pewter Brads
  • Whimsy Jumbo Wheel

Friday, August 6, 2010

Friends are Flowers....


Cherry Cobbler is so YUMMY! I just love this new colour and I am thinking people are going to be seeing a lot of this colour on my blog because Christmas is coming (I know it really isn't but for me and Christmas card designing, it's practically here...LOL!) In fact I have already designed two Christmas cards for upcoming classes. I am hoping to have my classes for October, November and December posted by the end of August so you can all see what is coming up. Check out my Stampin Up Website to see the details of my September Super Quick Cards class. I will post one of the cards here before the end of the month!

This card was made with the Friends Never Fade stamp set, Cherry Cobbler and Whisper White Cardstock, the Vintage Wallpaper embossing folder, White Taffeta ribbon and a Silver Ribbon Slide from the Styled Silver Hodgepodge Hardware Kit.

Wednesday, August 4, 2010

Crazy for Cupcakes....


This is a set I've had for a few years now but it is my definite "go to" stamp set when I need to make a birthday card. Soft Suede, Blushing Bride and Very Vanilla is now one of my favourite colour combinations out of all of our new colours. Pear Pizzazz added in looks fantastic too!

Please make note of my August 15th sign up deadline for Stamper Clubs sign ups this year. If I did not receive an e-mail from you, or you did not sign up at my July open house then you are not signed up. Please e-mail me (s-pdavid@sympatico.ca) to be sure I include you with the group of your choice before the deadline. I will be setting up clubs and club dates for September immediately after the 15th so club members watch your e-mail.

Sunday, August 1, 2010

A Garage Sale for You


This is your day to trade and/or sell your used Stamping and Scrapping items that you no longer need. So gather up the items you bought and regret or items you just no longer want to bring to my house and trade or sell for items you do want or money.
Most stores and demo’s charge a fee to provide a location and customers for this (usually a certain portion has to be spent in the store or with the demo). I won’t be doing that this year so the money you make is yours to do with what you want.

This event will start a 2pm on Saturday August 28th until 3:30. I will have all my tables out so you have a place to put your stuff.

If you are not selling anything you of course are invited to come and check out the great deals.

There are some rules:
· ALL items MUST be priced. If they are not priced when you get here you will need to put them away.
· Please be reasonable when pricing items. This is a garage sale so people are expecting bargains.
· Please do not bring 5 big boxes of stuff to sell. I don’t have that many tables (if it’s nice out feel free to bring your own tables because we will be outside)
· Please RSVP with me if you are bringing items to sell or trade
· Please do not bring anything in a current catalogue to sell